

This project can be as simple as buying a few pieces of lumber and some hardware to secure the corners. Start by deciding how big you’d like to build the bed. If you’re working with a limited area then 4′ x 4′ is good, or 2′ x 4′, even 2′ x 2′ is a usable size.
Go to the lumber store and choose two 2″ x 10″ x 8′ and ask the staff to cut it down to four pieces of 4′ planks or the desired shape that you’re after. This will give you a nice 4′ square raised bed planter.
I recommend a board that is 8″, 10″ or 12″ wide, it’ll make a deeper planter and offer more planting choices. You just need to buy the correct size of corner brackets. Corner brackets are available up to 24″ tall. This allows the option of making a deeper raised bed, just buy double the amount of lumber.
The corner brackets make it so easy, little more than a few screws and it’s done.
The corners can be basic or decorative depending on what you like. They are usually made of aluminium but plastic ones are also available. 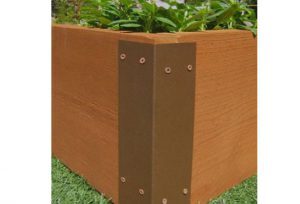
One important step to take to ensure you don’t have future problems with underground pests is by putting 1cm square wire mesh on the bottom of the bed before placing it down on the ground. Unroll the metal screen and cut a piece large enough to cover the entire bottom of the raised bed. Use a staple gun to attach it to the wood. (Buy a staple gun here). It’s also good to wear leather gloves to protect your hands.
Basic steps
- Get rid of the grass and pull the weeds
- Hard rake and level out the lumps and bumps
- Remove big rocks
- Lay down a double layer of landscape fabric on the ground
- Lay down your wooden frame with wire mesh attached (Buy it here)
- Fill it with soil
If your bed is more than 3′ wide then you’ll likely end up with a seam down the center. Use wire to sew the two sides together with a bit of an overlap. This is important as there cannot be any gaps in the wire barrier or the little underground critters will get through.
The wire mesh is a very important step because if it’s done correctly it eliminates the ability of underground pests such as moles, voles, mice and other critters to come up and eat the roots of your plants and generally wreak havoc in your raised bed. They will also eat your root vegetables from the bottom up or your carefully planted spring bulbs.
Reclaimed Paving Stones
Raised beds with paving stones is a pretty easy way to build a raised bed and can be built in a variety of designs, styles, heights and depths as well depending on what types of stone you have available.
Often, if you look you can find people online (Craigslist, Bidding Wars etc) advertising free or cheap rocks, paving stones and other materials. This is a perfect way to repurpose building materials and create a very low cost raised bed. You’ll see several of the raised beds that I built this way in the images throughout this website. Making a raised bed this way is even easier if you glue the stones together. Use construction adhesive, like this Gorilla Glue product or a PL construction adhesive product.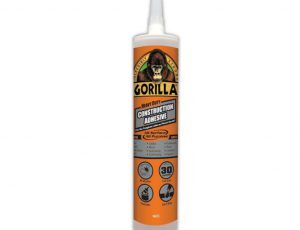
Cinder Blocks
Cinder blocks have always been an easy solution to building a raised bed. It’s not the cheapest because you have to buy perfect blocks that aren’t cracked or broken if you can’t find any for free.
The best part of cinder blocks is that the holes in each block can be filled with soil and be planted with a small annuals such as Calibrachoa or Bacopa.
Then in the summer you’ll have your raised bed filled with beneficial insect attracting perennial flowers along with bold blooming annuals spilling out over the edges of it.
It’s important to only use a cinder block raised bed for perennials and annuals. Don’t use cinder blocks to be the frame for a garden bed that will be used for growing food. The concrete is made with chemicals that will leach out in to the soil and be absorbed by the plants and transferred to the food.
Enclosed Garden Bed Kit
This type of garden is perfect if you have the space to go all out and build a solid well protected garden. If you need to protect your garden from deer and rabbits, then this is a great option. Follow the instructions and buy the right wood for the kit you’ve chosen. Cedar is the recommended wood to use because it’s naturally rot and pest resistant. 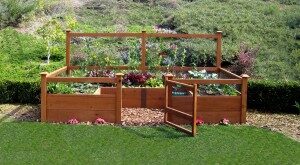
Again, I recommend picking up a roll of 1/4″ wire mesh for the bottom of the bed and rolls of good quality landscape fabric at the same time.
Fill with Soil
Now add your selected soil mixture and fill it almost full. At this point add the organic fertilizers such as the Down to Earth products as well as liquid seaweed and fish fertilizers. Also, add a soil enhancer such as steer manure for extra nutrient value in the soil.
Combine all of this very well. Then let the soil rest for a few days before planting in it. Use this time to go shopping and choose your plants. Planting is the most fun. Pretty much anything that can be grown in the ground can be grown in a good sized raised bed.
Leave a comment below if you need any help.
